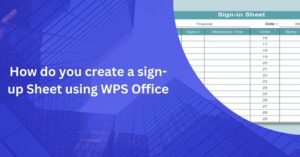
How to create a Sign up Sheet Template using WPS Office?
If you’re planning an event, overseeing the work of volunteers or running workshops, signing-up sheets are essential for collecting participant details. With its multi-tools and user-friendly design, WPS Office lets you quickly make a sign up sheet template form that meets your requirements. This article’ll guide you through creating your sign-up sheets app using WPS Office.
Part 1: WPS Office
WPS Office, developed by Kingsoft Corporation, is a complete office productivity suite that competes with well-known options like Microsoft Office. With its easy-to-use interface and abundant capabilities, WPS Office has become the preferred choice for people and businesses looking for a streamlined process for processing documents, presentation design, and spreadsheet administration.
Part 2: WPS Office is a robust office productivity suite with four distinctive features:
- Word Processing Writer: Provides efficient word processing, collaboration, and compatibility with different formats of files.
- WPS presentation: Enables captivating slide presentation using templates, animations and support for multimedia.
- WPS Spreadsheets: Allow for efficient data management, analysis, and visualization with various charts and functions.
- Editing PDF: With WPS pdf receipt template offers a variety of easy PDF editing options for text, images and annotations.
Part 3: How do you create a sign-up Sheet using WPS Office

Alt tag : How to create a Sign up Sheet Template using WPS Office?
Step 1: Access WPS Spreadsheet
For the first time, start WPS Office and open the WPS Spreadsheets application. The application will open an updated spreadsheet ready to be your registration sheet.
Step 2: Configure Your Columns
Choose the data you’ll need to gather from your participants, and design columns appropriate for the information you need to collect.
Step 3: Create in the Header Row
Create a header row that stands out using formatting options. Choose your header row by clicking and then dragging over the row’s numbers (usually “1”). Then, you can alter the font, size and colour using the formatting options in the toolbar.
Step 4: Validation of Data
Data validation ensures that the data provided is consistent and accurate. For example, you can define email address and telephone number guidelines to prevent mistakes. To include data validation, Select the cells you would like for confirmation, click “Data” at the top menu, and select “Data Validation.”
Step 5: Set Up Formulas
If you are required to do calculations or generate data in an automated way, then you can use formulas within WPS Spreadsheets. For instance, you could determine the total number of participants in an automatic way. To use procedures, begin a cell using the sign equal (=) and choose the appropriate function.
Step 6: Modify the look and feel
Create a sign-up sheet that is visually appealing by changing the formatting of your cells and borders or using different colours. Make sure the form remains straightforward to browse and read. You can use”Format” and then the “Format” option to alter the design and play with various styles.
Step 7: Print
If you prefer a printed form for signing up at in-person events, you can print it directly from the WPS Spreadsheets. Select “File,” then “Print,” and adjust the print settings to suit your needs.
Conclusion
Creating a sign-up form in Microsoft Spreadsheets in Office’s WPS Spreadsheets is a straightforward procedure that lets you efficiently collect participant data. With the ability to customize column layouts, data validation and numerous formats, you can customize the sign-up sheet to meet your needs. Utilizing WPS Office, you can simplify your processes for your company and ensure a smooth signing-up experience for your participants.


