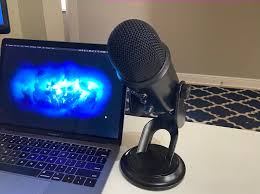
How to Improve Microphone Sound Quality on Laptop?
Do you ever find yourself wondering, while you listen to podcasts and radio programs, whether or not you could recreate the same level of sound quality in your own home? The correct hardware undoubtedly plays a role in the production of their pristine and crystal-clear sound. However, post-processing has a significant impact on a significant portion of the outcomes. After the recording, sound specialists edit the audio to improve the sound’s overall quality. They also have the ability to make live adjustments to the settings in order to improve the sound. However, one thing that remains crucial and unsaid is microphone drivers. Make sure the Microphone driver downloads are performed at regular intervals to maintain proper communication between the microphone and OS.
You may be wondering, “How can I improve the sound of my computer mic?” in light of this. You are free to make use of the methods that are standard practice in recording studios. Continue reading to discover how to improve the sound quality of the microphone on your laptop without spending an excessive amount of money. You’ll be able to get that fresh-from-the-studio sound with the aid of certain low-cost techniques and materials that we’ll go over in this section.
Tips to Improve Microphone Sound Quality on Laptop:
Apply the following methods to have an improved microphone experience. Make sure you follow all the solutions to avoid any sort of issues with your Mic.
Tip 1: Ensure a Reliable connection
If you are using a wired headset, making sure that the socket fits into your device securely will guarantee a steady connection. Sometimes, though, headset jacks get loose and headset plugs are twisted. If this is the problem you are experiencing, you need to fix your headphone jack by cleaning it, adjusting it, and fixing it. If nothing else works, though, you may have no choice but to look into getting a replacement.
Tip 2: Check and Fix Interference Problems.
The radio frequency that Bluetooth operates at is 2.4 GHz. But it’s not the only one that operates inside that frequency spectrum; there are others. There are numerous other appliances and gadgets that operate on the same frequency. Because of this, there is a possibility that interference problems may arise.
To combat this, consider doing one or more of the following steps:
Also read: Tips for Achieving Professional Quality When Holding a Wireless Microphone
Tip 3: Maintaining an Up-to-Date Version of Your Sound Drivers
You won’t be able to make the most of the capabilities of your stand-alone microphone, regardless of how good it is, if the sound drivers for your computer are missing, corrupted, or out of date. Although there are various methods through which you can download microphone drivers, we have explained a partly manual method.
Update Microphone driver via Device Manager:
Step 1: Simply hit the Windows Key and the letter S on your keyboard.
Step 2: In the search box, write “Device Manager” without quotation marks. To launch the Device Manager, just press the Enter key on your keyboard.
Step 3: Extend the scope of the category known as Audio Inputs and Outputs.
Step 4: Select Update Driver from the menu that appears when you right-click the microphone device you’re using.
Tip 4: Install the Audio Enhancement Third Party Software
If none of these techniques were successful in enhancing the quality of the audio and microphone in Windows, you may download and utilize third-party applications to increase the sound quality of your laptop or computer.
Also read: A History of Wireless Microphones: How They Were Invented
Closing Lines:
We hope that the above methods helped you in enhancing the quality of the Microphone. Do let us know if we missed out on anything. Also, the comment section is open to any kind of questions and suggestions. If you found the guide helpful, make sure to subscribe for similar tech guides and updates.