
How to Fix Grainy JPEG Images? [Best Working Solutions]
We usually capture many images every day on our smartphones or camera to save them for the future. But what if these pictures get blurry or grainy all of a sudden? Such a situation is definitely not less than a nightmare if we became unable to access any important picture. There are several reasons why your image files, including JPEG images, became blurred or grained on your device.
Luckily, there are many methods as well that you can try to fix grainy JPEG images. This article describes some best methods to help you know how to fix grainy photos from scratch. Along with the manual methods, you can also try photo repair tools, such as Stellar Repair for Photo to improve the appearance of grainy JPEG images. So, let’s start reading out more about these methods!
What Makes Your JPEG Images Grainy?
As mentioned above, there are many reasons why issues like JPEG blurriness or graininess can be caused can occur with your images. Before you know how to repair grainy photos, it is important to find the exact cause of the issue. Here are some main causes for your issue:
- High Compression Levels: JPEG images use lossy compression, i.e., they discard some image data to save storage space or reduce file size. In the case of High JPEG compression, your image may lose fine details, which results in blurriness or graininess.
- Low Resolution: When you try capturing images at a low resolution, it leads to pixelation and graininess when the image is viewed on larger screens.
- Image Sensor Size and Quality: Smaller image sensors or lower-quality sensors can generate more noise in images, which can make them blurry or grainy.
- Motion Blur: When you try capturing fast-moving subjects, instances may occur when you experience motion blur, causing images to appear blurry.
- JPEG Compression Artifacts: Sometimes JPEG compression automatically generates blocky or pixelated artifacts, mainly around high-contrast areas or edges.
How do I Fix Grainy Pictures?
Now that you are familiar with some crucial reasons for your grainy JPEG images, it’s time to apply proper methods to fix them. Fixing grainy images can be quite challenging, but you can try any of the following methods to repair them:
Method 01: Apply Noise Reduction
Several prominent photo editing software programs consist of built-in noise reduction tools, which automatically reduce the level of graininess in your image by smoothing it. All you need to do is to configure multiple noise reduction settings until you achieve a balance between noise reduction and retaining image details. It is also important to note that too much noise reduction can cause a loss of fine details and a plastic-like appearance.
Go through the following steps to know how to repair grainy photos by noise reduction via a popular picture editing software, i.e., Adobe’s Lightroom:
- Launch Lightroom software and open grainy images in it that you want to repair.
- Go to the Developmodule and then navigate to the Noise Reduction
- Now, from the Luminarc and Color options, click on Luminarc to start using it.
- After that, change the noise reduction settings to reduce the noise as per your requirement.
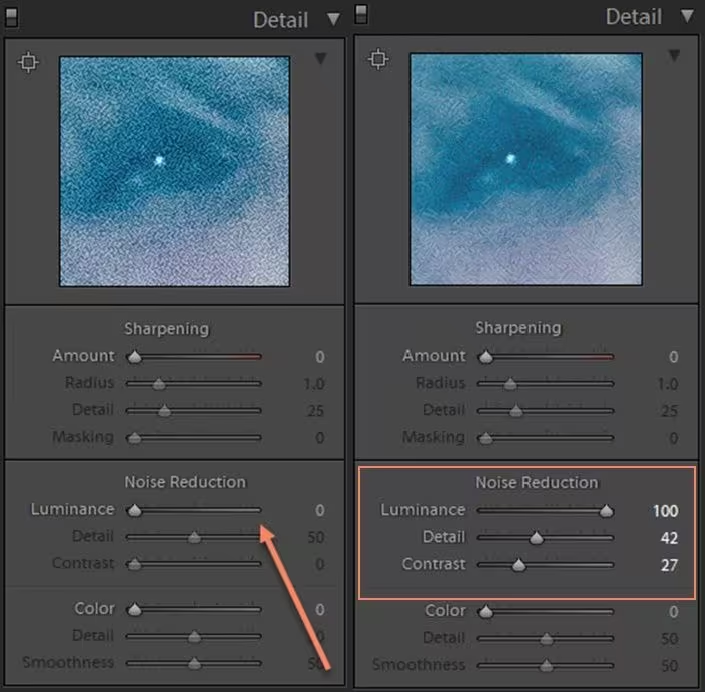
- Adjust the details and contrast till you get a satisfactory result.
Once you are done with the editing and repairing process, save your images at any safe location on your device.
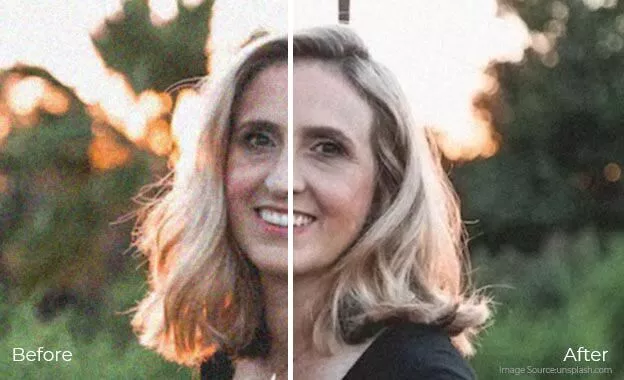
Method 02: Repair Grainy Images Using Photoshop
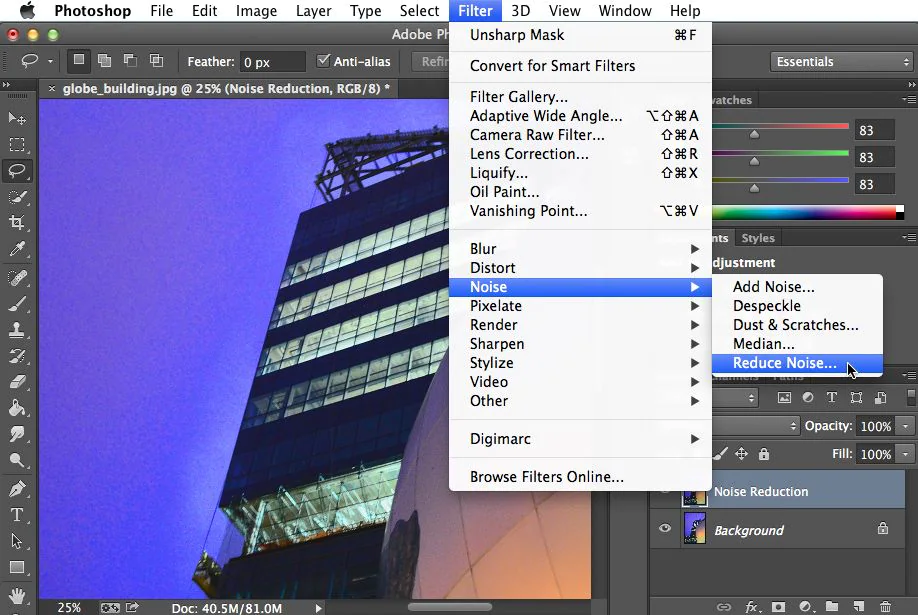
Adobe Photoshop is an alternative to Lightroom tool which allows you to repair your images to some extent. Its built-in feature reduces noise and repairs images to some level. You can go through the following steps to know how to fix grainy images using Photoshop software:
- Open the image which you need to repair in the Photoshop
- Click on the Filter tab located at the menu bar and then click Noise > Reduce Noise.
- Now, you can adjust the sliders respective to the Strength, Sharpen Details, and Preserve Details
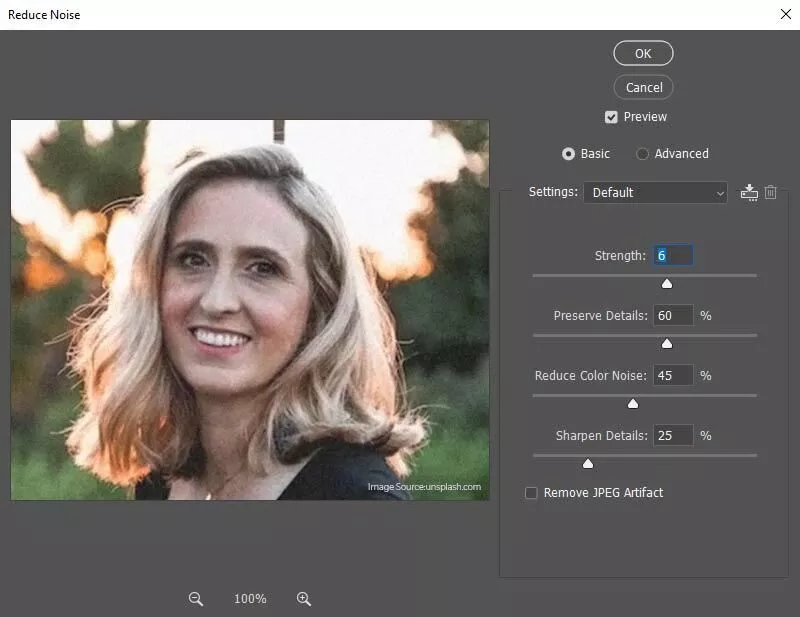
- Keep adjusting the slider until the grainy image is fixed to some extent.
- After successfully executing the changes, preview your image by clicking on ‘Remove JPEG Artifact.’ and then save them at the desired location.
Method 03: Repair Grainy Images Using Photo Repair Software
Before we get into how to repair JPEG files using the Stellar Repair for Photo tool, it is important to check some amazing features of this tool. These mainly include:
- Repair photos damaged due to any corruption issues, including grainy photos, dark photos, pixelated photos, etc.
- Not only JPEG images, the software support repairing images of multiple types including JPG, PNG, CR3, CR2, etc.
- You can use this tool to repair images stored in any internal or external storage devices, including HDDs, SSDs, SD cards, and more.
- Support repairing grainy images stored on Windows 11/10/8/7/Vista and MacOS devices as well.
- The software is 100% safe and secure to download and offers a user-friendly interface which makes it easy for beginners as well to use this tool.
Now check the step-by-step instructions to fix grainy JPEG images using the Stellar Repair for Photo tool:
- Download and install the software on your device. Launch it and from the homepage, and click Add File to upload the photos that you need to repair.
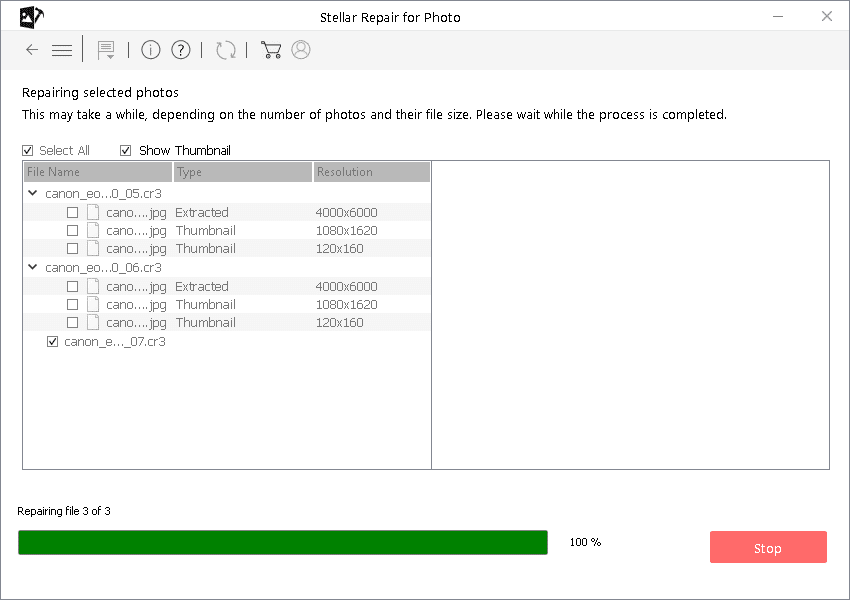
- After adding the grainy images, click the Repair button to start the repair process. Wait till the repair gets completed which depends on the size of your file as well as the computing power of your device.
- Once the repair process is over, preview the repaired JPEG images and click the Save Repaired Files button to save them to a desired storage location.

Tips to Avoid Graininess in JPEG Images
To avoid issues like graininess or blurriness of JPEG images, you can consider the following tips from your end:
- Select higher-quality image settings when saving JPEG files on your device.
- Use a stable platform to avoid image movement while capturing.
- Make sure you have proper focus and use higher-quality lenses while saving pictures. It could make your image look more grainy or blurry.
- Avoid removing an SD card from your camera while transferring images from it to your PC.
Conclusion
Remember that completely eliminating graininess from images without losing image quality is not possible. However, you can easily apply the aforementioned methods to know how to fix grainy JPEG images. You can easily fix grainy JPEG images using photo editing software, like Photoshop and Lightroom. But if these tools fail, you can use tools like Stellar Repair for Photo to repair any digital photo in no time.